
In today's AI-driven world, large language models (LLMs) like ChatGPT have revolutionized how we interact with technology. However, using public AI services comes with privacy concerns, limited customization options, and potential costs. By self-hosting your own AI chatbot, you gain complete control over your data, can customize the model to your specific needs, and potentially reduce long-term costs.
This tutorial will guide you through deploying your own AI chatbot powered by Llama 2, a powerful open-source language model, on your Convox infrastructure. You'll build a complete solution with a FastAPI backend that efficiently serves the model and a sleek React frontend that provides an intuitive chat interface.
By the end of this tutorial, you'll have a fully functional, production-ready AI chatbot deployed on your own infrastructure with:
Before we begin, ensure you have the following:
For a production-quality chatbot, you'll need:

Our chatbot application consists of three main components:
Here's a high-level diagram of how these components interact:
┌────────────────┐     ┌────────────────┐     ┌────────────────┐
│                │     │                │     │                │
│  Web Frontend  │◄───►│  API Service   │◄───►│  Model Server  │
│  (React/Nginx) │     │   (FastAPI)    │     │   (Llama 2)    │
│                │     │                │     │                │
└────────────────┘     └────────────────┘     └────────────────┘
This separation of concerns allows us to:
Let's get started by setting up our project structure. Here's how your directory structure should look:
llama2-convox-chatbot/
├── convox.yml
├── download_model.py
├── model-server/
│   ├── app.py
│   ├── Dockerfile
│   ├── requirements.txt
│   └── models/
│       └── llama-2-7b-chat/  # Model files will be stored here
├── api-service/
│   ├── app.py
│   ├── Dockerfile
│   └── requirements.txt
└── frontend/
    ├── public/
    ├── src/
    │   ├── App.js
    │   ├── App.css
    │   └── index.js
    ├── package.json
    ├── Dockerfile
    └── nginx.conf
Create this directory structure or clone the provided repository and we'll populate the files as we go through the tutorial:
The complete source code for this tutorial is available in our GitHub repository, including all the directory structure and files mentioned above. You can clone the repository directly to get started quickly:
git clone https://github.com/convox-examples/llama2-convox-chatbot.git
cd llama2-convox-chatbot
Using this repository will save you time setting up the project structure and writing all the configuration files from scratch. Feel free to customize it for your specific needs!
Or you can manually create and copy the code:
mkdir -p llama2-convox-chatbot/{model-server,api-service,frontend/{public,src}}
mkdir -p llama2-convox-chatbot/model-server/models/llama-2-7b-chat
cd llama2-convox-chatbotOur backend consists of two services: the model server and the API service.
The model server uses the vLLM library to efficiently serve the Llama 2 model. Here's the key part of the model server code:
File: model-server/app.py
from fastapi import FastAPI, HTTPException
from pydantic import BaseModel
from vllm import LLM, SamplingParams
import os

app = FastAPI()

# Load environment variables
model_path = os.environ.get("MODEL_PATH", "meta-llama/Llama-2-7b-chat-hf")
max_tokens = int(os.environ.get("MAX_TOKENS", "512"))

# Initialize the model
model = LLM(model_path)

class GenerationRequest(BaseModel):
    prompt: str
    max_tokens: int = max_tokens
    temperature: float = 0.7
    top_p: float = 0.9

class GenerationResponse(BaseModel):
    text: str

@app.post("/generate", response_model=GenerationResponse)
async def generate(request: GenerationRequest):
    sampling_params = SamplingParams(
        max_tokens=request.max_tokens,
        temperature=request.temperature,
        top_p=request.top_p
    )

    # Format the prompt for Llama 2
    formatted_prompt = f"""<s>[INST] {request.prompt} [/INST]"""

    try:
        outputs = model.generate(formatted_prompt, sampling_params)
        generated_text = outputs[0].outputs[0].text
        return GenerationResponse(text=generated_text)
    except Exception as e:
        raise HTTPException(status_code=500, detail=str(e))
File: model-server/requirements.txt
fastapi==0.103.1
pydantic==2.3.0
uvicorn==0.23.2
vllm==0.1.4
File: model-server/Dockerfile
FROM nvidia/cuda:11.8.0-runtime-ubuntu22.04 as base

# Install Python and dependencies
RUN apt-get update && apt-get install -y \
    python3 \
    python3-pip \
    git \
    wget \
    && rm -rf /var/lib/apt/lists/*

WORKDIR /app

# Install vLLM and other requirements
COPY requirements.txt .
RUN pip3 install --no-cache-dir -r requirements.txt

# Copy the application code
COPY app.py .
COPY download_model.py .

# Create model directory
RUN mkdir -p /app/models

# Download model during build (ARG will be passed from convox build)
ARG HF_TOKEN
ENV HF_TOKEN=${HF_TOKEN}
# Download the model if HF_TOKEN is provided, otherwise it will be mounted
RUN if [ ! -z "$HF_TOKEN" ]; then \
      python3 download_model.py; \
    else \
      echo "HF_TOKEN not provided, skipping model download. Model will be mounted at runtime."; \
    fi

# Set environment variables
ENV MODEL_PATH=/app/models
ENV MAX_TOKENS=512

# Run the server
CMD ["uvicorn", "app:app", "--host", "0.0.0.0", "--port", "8000"]The API service manages chat sessions and forwards requests to the model server:
File: api-service/app.py
from fastapi import FastAPI, HTTPException, Depends
from fastapi.middleware.cors import CORSMiddleware
from pydantic import BaseModel
import httpx
import os
import uuid
from typing import List, Dict, Optional

app = FastAPI()

# Enable CORS
app.add_middleware(
    CORSMiddleware,
    allow_origins=["*"],  # Update this to limit to your frontend domain in production
    allow_credentials=True,
    allow_methods=["*"],
    allow_headers=["*"],
)

MODEL_SERVER_URL = os.environ.get("MODEL_SERVER_URL", "http://model-server:8000")

# In-memory storage for chat history
# In production, use a proper database
chat_sessions: Dict[str, List[Dict]] = {}

class Message(BaseModel):
    role: str  # 'user' or 'assistant'
    content: str

class ChatRequest(BaseModel):
    session_id: Optional[str] = None
    message: str
    temperature: float = 0.7
    max_tokens: int = 512

class ChatResponse(BaseModel):
    session_id: str
    reply: str
    history: List[Message]

@app.post("/chat", response_model=ChatResponse)
async def chat(request: ChatRequest):
    # Create a new session if none is provided
    session_id = request.session_id or str(uuid.uuid4())

    # Initialize session if it doesn't exist
    if session_id not in chat_sessions:
        chat_sessions[session_id] = []

    # Add user message to history
    chat_sessions[session_id].append({"role": "user", "content": request.message})

    # Construct prompt from chat history
    prompt = ""
    for msg in chat_sessions[session_id]:
        role_prefix = "User: " if msg["role"] == "user" else "Assistant: "
        prompt += f"{role_prefix}{msg['content']}\nAssistant: "

    # Call the model server
    async with httpx.AsyncClient() as client:
        try:
            response = await client.post(
                f"{MODEL_SERVER_URL}/generate",
                json={
                    "prompt": prompt,
                    "temperature": request.temperature,
                    "max_tokens": request.max_tokens
                }
            )
            response.raise_for_status()
            data = response.json()
            assistant_reply = data["text"]

            # Add assistant response to history
            chat_sessions[session_id].append({"role": "assistant", "content": assistant_reply})

            return ChatResponse(
                session_id=session_id,
                reply=assistant_reply,
                history=chat_sessions[session_id]
            )
        except httpx.HTTPError as e:
            raise HTTPException(status_code=500, detail=f"Error calling model server: {str(e)}")
File: api-service/requirements.txt
fastapi==0.103.1
pydantic<2.0
uvicorn==0.23.2
vllm==0.1.4
File: api-service/Dockerfile
FROM python:3.9-slim

WORKDIR /app

# Install dependencies
COPY requirements.txt .
RUN pip install --no-cache-dir -r requirements.txt

# Copy the application code
COPY app.py .

# Run the API server
CMD ["uvicorn", "app:app", "--host", "0.0.0.0", "--port", "8080"]
For the frontend, we'll use React to create a simple but effective chat interface:
File: frontend/src/index.js
import React from 'react';
import ReactDOM from 'react-dom/client';
import './App.css';
import App from './App';

const root = ReactDOM.createRoot(document.getElementById('root'));
root.render(
  <React.StrictMode>
    <App />
  </React.StrictMode>
);
File: frontend/src/App.js
import React, { useState, useEffect, useRef } from 'react';
import './App.css';

function App() {
  const [messages, setMessages] = useState([]);
  const [input, setInput] = useState('');
  const [sessionId, setSessionId] = useState(null);
  const [loading, setLoading] = useState(false);
  const messagesEndRef = useRef(null);

  // Scroll to bottom when messages change
  useEffect(() => {
    messagesEndRef.current?.scrollIntoView({ behavior: 'smooth' });
  }, [messages]);

  // Initialize session ID from localStorage or create new one
  useEffect(() => {
    const storedSessionId = localStorage.getItem('chatSessionId');
    if (storedSessionId) {
      setSessionId(storedSessionId);
    }
  }, []);

  const handleSubmit = async (e) => {
    e.preventDefault();
    if (!input.trim()) return;

    // Add user message
    const userMessage = { role: 'user', content: input };
    setMessages(prev => [...prev, userMessage]);
    setInput('');
    setLoading(true);

    try {
      const response = await fetch('/api/chat', {
        method: 'POST',
        headers: {
          'Content-Type': 'application/json',
        },
        body: JSON.stringify({
          session_id: sessionId,
          message: input,
        }),
      });

      if (!response.ok) {
        throw new Error('Failed to get response');
      }

      const data = await response.json();

      // Store session ID if it's new
      if (!sessionId) {
        setSessionId(data.session_id);
        localStorage.setItem('chatSessionId', data.session_id);
      }

      // Add assistant message
      setMessages(prev => [...prev, { role: 'assistant', content: data.reply }]);
    } catch (error) {
      console.error('Error:', error);
      setMessages(prev => [...prev, {
        role: 'assistant',
        content: 'Sorry, I encountered an error. Please try again.'
      }]);
    } finally {
      setLoading(false);
    }
  };

  return (
    <div className="chat-container">
      <div className="chat-header">
        <h1>Your Personal AI Assistant</h1>
      </div>
      <div className="chat-messages">
        {messages.length === 0 ? (
          <div className="welcome-message">
            <h2>Welcome to Your AI Assistant</h2>
            <p>Ask me anything to get started!</p>
          </div>
        ) : (
          messages.map((message, index) => (
            <div
              key={index}
              className={`message ${message.role === 'user' ? 'user-message' : 'assistant-message'}`}
            >
              <div className="message-content">{message.content}</div>
            </div>
          ))
        )}
        {loading && (
          <div className="message assistant-message">
            <div className="message-content loading">...</div>
          </div>
        )}
        <div ref={messagesEndRef} />
      </div>
      <form className="chat-input-form" onSubmit={handleSubmit}>
        <input
          type="text"
          value={input}
          onChange={(e) => setInput(e.target.value)}
          placeholder="Type your message..."
          disabled={loading}
        />
        <button type="submit" disabled={loading || !input.trim()}>
          Send
        </button>
      </form>
    </div>
  );
}

export default App;
File: frontend/src/App.css
.chat-container {
  max-width: 800px;
  margin: 0 auto;
  height: 100vh;
  display: flex;
  flex-direction: column;
  font-family: 'Segoe UI', Tahoma, Geneva, Verdana, sans-serif;
}

.chat-header {
  background-color: #2c3e50;
  color: white;
  padding: 20px;
  text-align: center;
}

.chat-header h1 {
  margin: 0;
  font-size: 24px;
}

.chat-messages {
  flex: 1;
  overflow-y: auto;
  padding: 20px;
  background-color: #f5f5f5;
}

.welcome-message {
  text-align: center;
  color: #666;
  margin-top: 100px;
}

.message {
  margin-bottom: 15px;
  max-width: 80%;
  clear: both;
}

.user-message {
  float: right;
}

.assistant-message {
  float: left;
}

.message-content {
  padding: 12px 16px;
  border-radius: 18px;
  display: inline-block;
  word-break: break-word;
}

.user-message .message-content {
  background-color: #007bff;
  color: white;
  border-top-right-radius: 4px;
}

.assistant-message .message-content {
  background-color: #e9e9eb;
  color: #333;
  border-top-left-radius: 4px;
}

.loading {
  animation: pulse 1.5s infinite;
}

@keyframes pulse {
  0% { opacity: 0.5; }
  50% { opacity: 1; }
  100% { opacity: 0.5; }
}

.chat-input-form {
  display: flex;
  padding: 20px;
  background-color: white;
  border-top: 1px solid #e9e9eb;
}

.chat-input-form input {
  flex: 1;
  padding: 12px 16px;
  border: 1px solid #ddd;
  border-radius: 24px;
  font-size: 16px;
  outline: none;
}

.chat-input-form button {
  margin-left: 10px;
  padding: 12px 24px;
  background-color: #007bff;
  color: white;
  border: none;
  border-radius: 24px;
  font-size: 16px;
  cursor: pointer;
  transition: background-color 0.3s;
}

.chat-input-form button:hover {
  background-color: #0056b3;
}

.chat-input-form button:disabled {
  background-color: #cccccc;
  cursor: not-allowed;
}
File: frontend/package.json
{
  "name": "llama2-chatbot-frontend",
  "version": "0.1.0",
  "private": true,
  "dependencies": {
    "react": "^18.2.0",
    "react-dom": "^18.2.0",
    "react-scripts": "5.0.1"
  },
  "scripts": {
    "start": "react-scripts start",
    "build": "react-scripts build",
    "test": "react-scripts test",
    "eject": "react-scripts eject"
  },
  "eslintConfig": {
    "extends": [
      "react-app",
      "react-app/jest"
    ]
  },
  "browserslist": {
    "production": [
      ">0.2%",
      "not dead",
      "not op_mini all"
    ],
    "development": [
      "last 1 chrome version",
      "last 1 firefox version",
      "last 1 safari version"
    ]
  }
}
File: frontend/Dockerfile
FROM node:16-alpine as build

WORKDIR /app

# Copy package.json and package-lock.json
COPY package*.json ./

# Install dependencies
RUN npm ci

# Copy the rest of the frontend code
COPY . .

# Build the React app
RUN npm run build

# Use Nginx to serve the static files
FROM nginx:alpine

# Copy the build output to nginx
COPY --from=build /app/build /usr/share/nginx/html

# Copy custom nginx config
COPY nginx.conf /etc/nginx/conf.d/default.conf

EXPOSE 3000

CMD ["nginx", "-g", "daemon off;"]
File: frontend/nginx.conf
server {
    listen 3000;

    location / {
        root /usr/share/nginx/html;
        index index.html index.htm;
        try_files $uri $uri/ /index.html;
    }

    # Proxy API requests to the API service
    location /api/ {
        proxy_pass http://api-service:8080/;
        proxy_http_version 1.1;
        proxy_set_header Upgrade $http_upgrade;
        proxy_set_header Connection 'upgrade';
        proxy_set_header Host $host;
        proxy_cache_bypass $http_upgrade;
    }
}
File: frontend/public/index.html
<!DOCTYPE html>
<html lang="en">
  <head>
    <meta charset="utf-8" />
    <meta name="viewport" content="width=device-width, initial-scale=1" />
    <meta name="theme-color" content="#000000" />
    <meta
      name="description"
      content="Self-hosted AI Chatbot powered by Llama 2"
    />
    <title>AI Chatbot</title>
  </head>
  <body>
    <noscript>You need to enable JavaScript to run this app.</noscript>
    <div id="root"></div>
  </body>
</html>Now it's time to create the convox.yml manifest that will define our application for Convox:
File: convox.yml
environment:
  - MODEL_PATH=/app/models/llama-2-7b-chat
  - MAX_TOKENS=512
  - MODEL_SERVER_URL=http://model-server:8000
  - HF_TOKEN=  # Will be set using convox env set

services:
  model-server:
    build: ./model-server
    port: 8000
    scale:
      cpu: 1000      # 1 vCPU
      memory: 8192   # 8GB RAM
      count: 1
      gpu: 1         # Request 1 GPU for the model server
    volumes:
      - /app/models:/app/models
    nodeSelectorLabels:
      convox.io/label: gpu-nodes  # Schedule on our GPU node group

  api-service:
    build: ./api-service
    port: 8080
    scale:
      cpu: 256       # 0.25 vCPU
      memory: 512    # 512MB RAM
      count: 2       # 2 instances for better availability
    environment:
      - MODEL_SERVER_URL=http://model-server:8000

  frontend:
    build: ./frontend
    port: 3000
    scale:
      cpu: 256       # 0.25 vCPU
      memory: 256    # 256MB RAM
count: 2 # 2 instances for better availabilityWe need to download the Llama 2 model for our chatbot. Create the following script in your project root:
File: download_model.py
import os
import sys
import subprocess

def download_model():
    # Ensure Hugging Face credentials are set
    if not os.environ.get("HF_TOKEN"):
        print("Error: HF_TOKEN environment variable not set.")
        print("Please set it to your Hugging Face token with access to Llama 2.")
        sys.exit(1)

    model_name = "meta-llama/Llama-2-7b-chat-hf"
    output_dir = "/app/models/llama-2-7b-chat"

    print(f"Downloading {model_name} to {output_dir}...")

    # Create output directory if it doesn't exist
    os.makedirs(output_dir, exist_ok=True)

    # Download the model using Hugging Face CLI
    subprocess.run([
        "python", "-m", "huggingface_hub", "download",
        "--repo-id", model_name,
        "--local-dir", output_dir,
        "--token", os.environ["HF_TOKEN"]
    ])

    print(f"Model downloaded successfully to {output_dir}")

if __name__ == "__main__":
    download_model()
You should also copy this script to the model-server directory:
cp download_model.py model-server/This script will be used inside the Dockerfile to download the model during the build process if the HF_TOKEN environment variable is provided. We've configured it this way because:
In production, pre-downloading and mounting is often preferred for faster container startup times and to avoid repeated downloads.
Before we deploy, we need to configure a GPU node group in our Convox rack to efficiently run our LLM. This is a critical step since running inference on modern language models is significantly faster with GPU acceleration.
Convox allows you to define custom node groups for specialized workloads like GPU-intensive applications. First, we'll create a node group configuration file:
File: gpu-nodes.json
[
  {
    "id": 101,
    "type": "g4dn.xlarge",
    "disk": 100,
    "capacity_type": "ON_DEMAND",
    "min_size": 1,
    "max_size": 2,
    "label": "gpu-nodes"
  }
]
Now, apply this configuration to your rack (please use the appropriate path to where you created the JSON template):
convox rack params set additional_node_groups_config=./gpu-nodes.json -r your-rack-nameThis creates a dedicated node group with GPU-enabled instances. We'll direct our model-server to these nodes using the nodeSelectorLabels in our convox.yml.
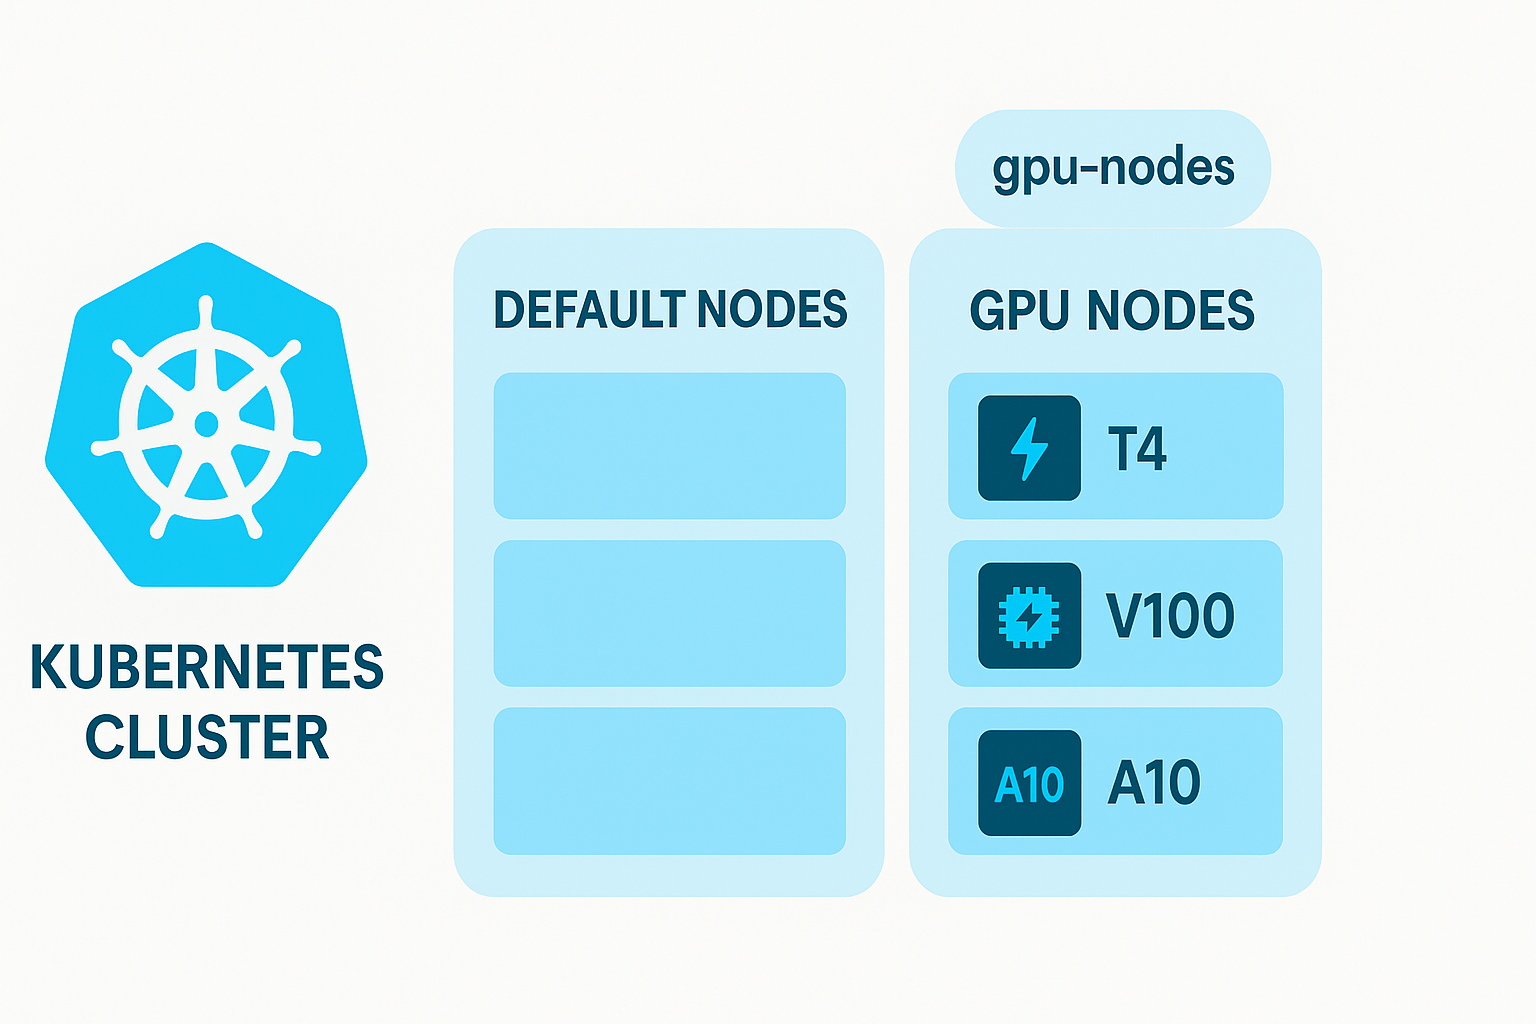
To use GPUs in Kubernetes (which Convox uses under the hood), you need to enable the NVIDIA device plugin:
convox rack params set nvidia_device_plugin_enable=true -r your-rack-nameThis allows Kubernetes to discover and expose the GPU resources to our containers.
Now we're ready to deploy our application to Convox:
convox apps create llama-chatbot# Set your Hugging Face token for model downloads
convox env set HF_TOKEN=your_huggingface_token -a llama-chatbotconvox deploy -a llama-chatbot --build-args "HF_TOKEN=your_huggingface_token"The --build-args flag passes your token to the build process, allowing the model to be downloaded during image building. If you prefer not to download during build, you can:
The deployment will:
convox.yml specificationconvox ps -a llama-chatbotThis command shows the status of your running processes. The model-server should be scheduled on one of your GPU nodes.
Once the deployment is complete, you can access your chatbot using the frontend URL:
convox services -a llama-chatbotYou'll see output similar to this:
SERVICE       DOMAIN                                                PORTS
frontend      frontend.llama-chatbot.0a1b2c3d4e5f.convox.cloud     443:3000
api-service   api-service.llama-chatbot.0a1b2c3d4e5f.convox.cloud  443:8080
model-server  model-server.llama-chatbot.0a1b2c3d4e5f.convox.cloud 443:8000
Note that Convox has automatically created HTTPS endpoints with valid SSL/TLS certificates for all your services. Open the frontend URL in your browser to start chatting with your AI assistant!
To verify that your model is using the GPU correctly:
convox exec model-server-1234abcd nvidia-smi -a llama-chatbotYou should see output showing GPU utilization, particularly when generating responses. If the GPU is being used properly, you'll see:
+-----------------------------------------------------------------------------+
| NVIDIA-SMI 525.85.12    Driver Version: 525.85.12    CUDA Version: 12.0     |
|-------------------------------+----------------------+----------------------+
| GPU  Name        Persistence-M| Bus-Id        Disp.A | Volatile Uncorr. ECC |
| Fan  Temp  Perf  Pwr:Usage/Cap|         Memory-Usage | GPU-Util  Compute M. |
|                               |                      |               MIG M. |
|===============================+======================+======================|
|   0  NVIDIA T4          Off   | 00000000:00:04.0 Off |                  N/A |
| N/A   45C    P0    27W /  70W |   7982MiB /  8192MiB |     35%      Default |
|                               |                      |                  N/A |
+-------------------------------+----------------------+----------------------+
This indicates that the model is loaded into GPU memory and actively using the GPU for inference.
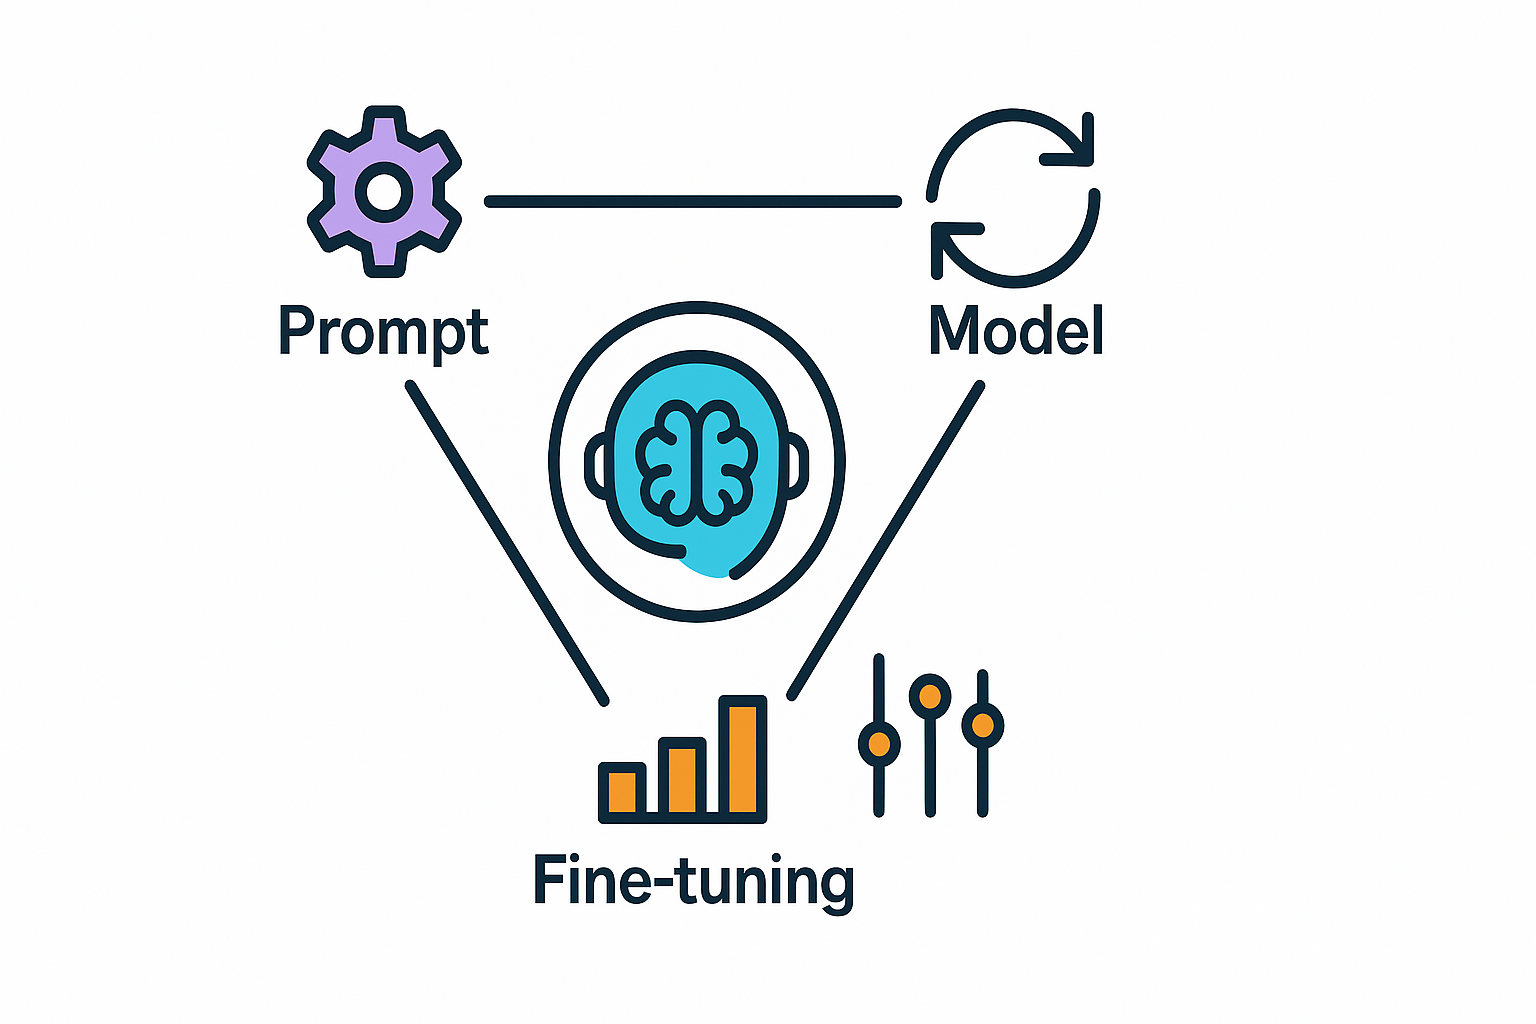
You can easily switch to different LLM models by changing the MODEL_PATH environment variable. Some options include:
Improve your chatbot's responses by customizing the prompt formatting in the API service:
# Example of a more detailed prompt format
system_prompt = "You are a helpful, friendly AI assistant. Answer questions accurately and be honest when you don't know something."
formatted_prompt = f"{system_prompt}\n\n"

for msg in chat_sessions[session_id]:
    role_prefix = "User: " if msg["role"] == "user" else "Assistant: "
    formatted_prompt += f"{role_prefix}{msg['content']}\n"

formatted_prompt += "Assistant: "For advanced users, you can fine-tune the base model on your own data to make it more suitable for your specific use case. This involves:
convox.yml or switch to a smaller model.To debug issues, check the logs for each service:
convox logs -a llama-chatbot --service model-server
convox logs -a llama-chatbot --service api-service
convox logs -a llama-chatbot --service frontendFor a production-ready deployment, consider these additional steps:
Congratulations! You've successfully deployed your own AI chatbot using Llama 2 on Convox. This setup gives you complete control over your AI assistant while leveraging Convox's platform to handle the deployment complexities.
By hosting your own AI chat solution, you've gained:
As AI technology continues to evolve, your self-hosted solution can evolve with it, incorporating the latest open-source models and techniques.
Happy chatting with your new AI assistant!